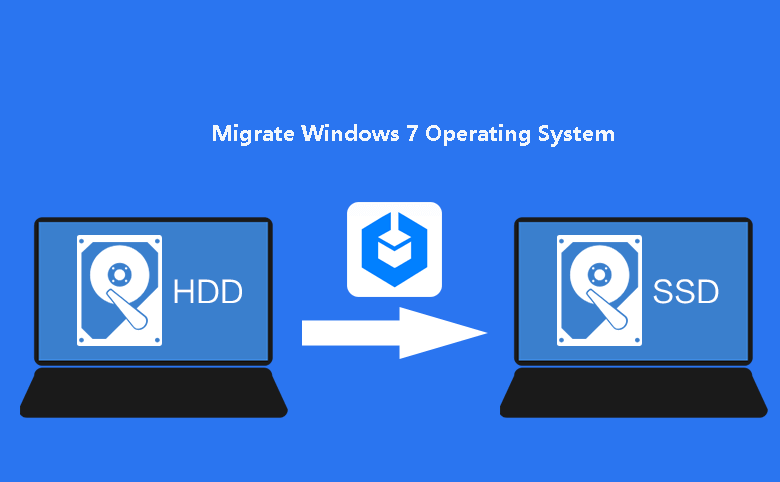
Freeware: Migrate Windows 7 to SSD and Boot From It Successfully
This post aims to tell you AOMEI Partition Assistant Standard allows you to free migrate Windows 7 to SSD without reinstalling.
By AOMEI / Updated on May 12, 2023
Why need to migrate Windows 7 from HDD to SSD?
Nowadays, many Windows users would like to transfer the OS from HDD to SSD. That’s mainly because the SSD is faster and more reliable than an HDD. Replacing the HDD with a SSD should be the most cost-effective way to give your computer a fresh start and give you a smoother experience.
How to migrate Windows 7 to SSD free without reinstalling
Moving or transferring Windows 7 from HDD to SSD is quite different from copying personal data (videos, pictures, images, documents, etc). It is a little complex, but a proper OS migration tool can make it easy. Here we would like to recommend you using the free partition manager: AOMEI Partition Assistant Standard. Its “Migrate OS to SSD Wizard” is designed to let you migrate Windows 7, Windows 8, Windows 10, Windows 11 to SSD in a stepwise manner that anyone can implement easily.
- ★Prior to OS migration, please do:
- Connect the SSD to the Windows 7 computer via a proper method and make sure it is organized successfully by the PC.
- Move some big programs from system drive to another one and shrink the Windows 7 partition to make it smaller if you want to migrate Windows 7 to a smaller SSD drive.
- Back up everything important on the SSD drive since they will be erased during the migration process.
Now, download the software to see how to migrate Windows 7 to SSD step by step.
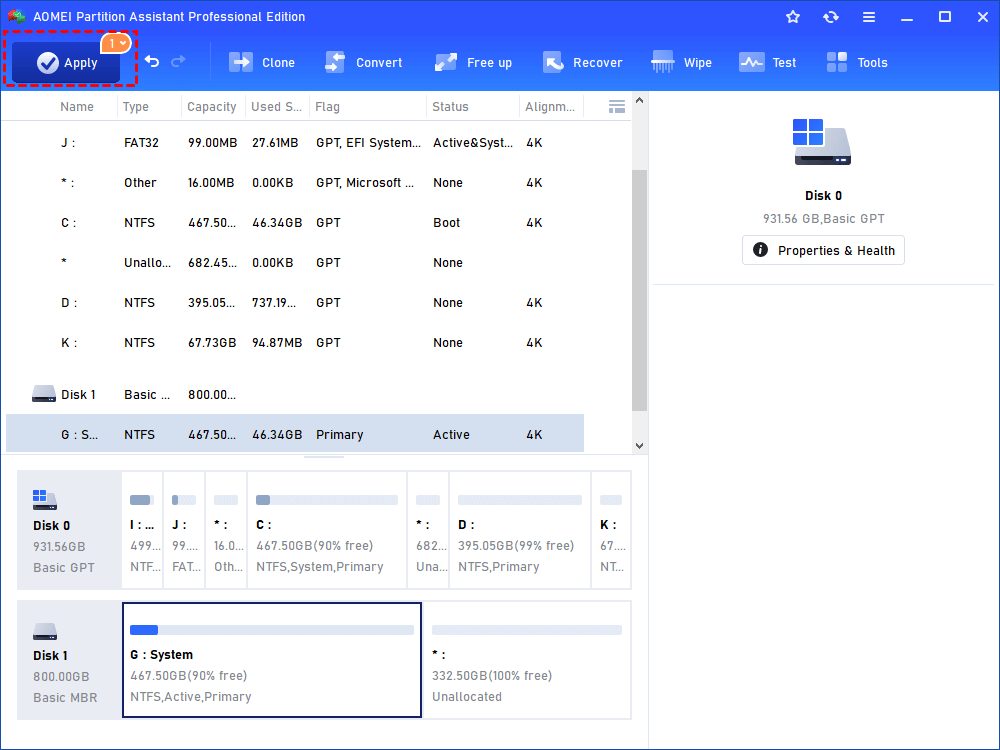
Step 1. Launch the installed AOMEI Partition Assistant Professional. On the top toolbar, choose “Clone” > “Migrate OS”.

Step 2. Choose unallocated space on the SSD drive and click on “Next”. If there is no unallocated space, you can tick “I want to delete all partitions on the disk # to migrate system to this disk”.

Step 3. Now, you can resize the new system partition on the SSD drive.

Step 4. Finally, click “Apply” to commit the pending operation.
After moved Windows 7 to SSD free. To boot the computer from the SSD, please change boot order in the BIOS setting.

Further tips: Migrate Windows 7 to SSD without third-party software
If you don’t want to finish the migration by using any third-party software, then you try the Windows 7 itself “backup & restore” function. It allows you to make a system image backup and restore it to the SSD drive. However, only volumes formatted with NTFS can be protected. If the partition that you want to backup or set up as a backup destination drive is formatted with FAT32, you can convert FAT32 to NTFS without data loss. Following are detailed steps of creating a system image, creating bootable media and restoring the system image.
- Note:✎...
- The restoring operation would overwrite the selected partition. Backup files to safe places like external hard drive or cloud storage.
▶ Part 1. Create a system backup image
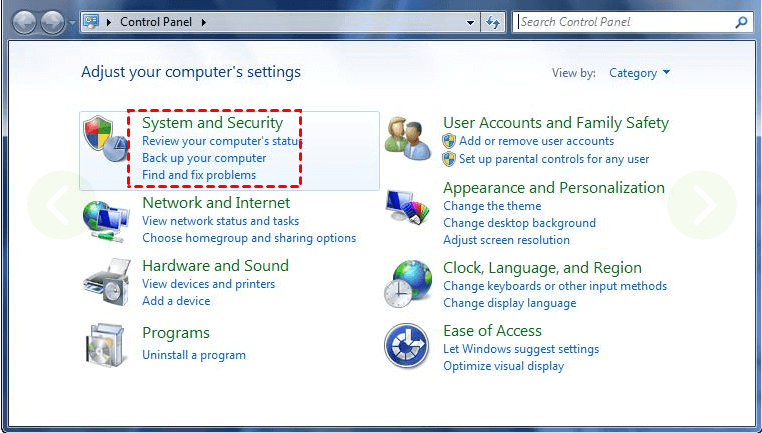
Step 1. Click Start, choose Control Panel. In Control Panel, select System and Security.
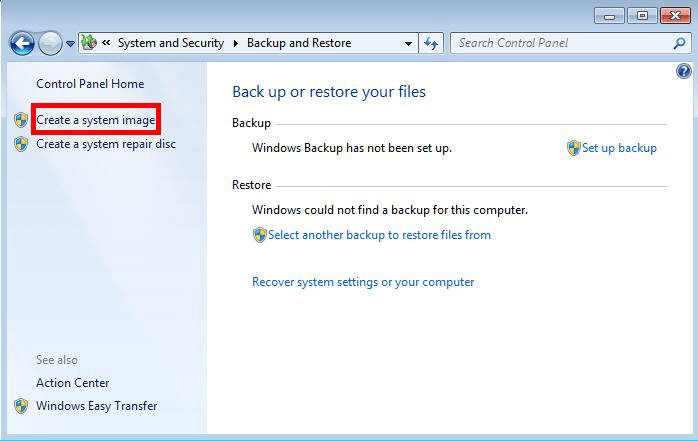
Step 2. In System and Security Home, click on “Create a system image” like in the picture below.
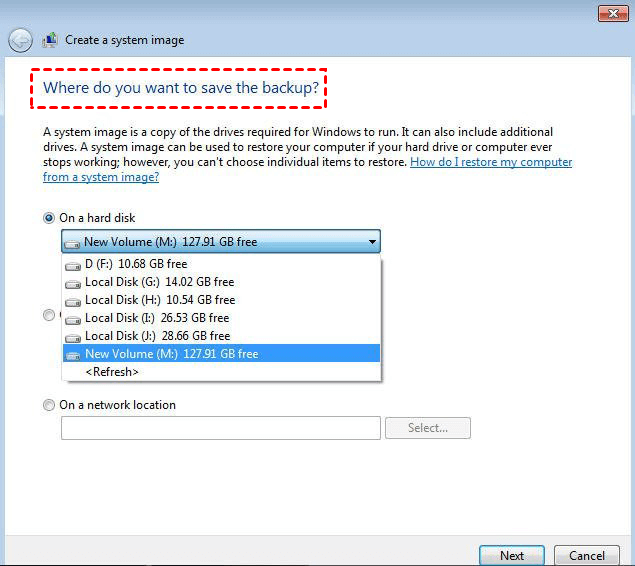
Step 3. You’ll be asked where we want to save the backup. Just select a partition as the destination drive. Click Next to proceed.
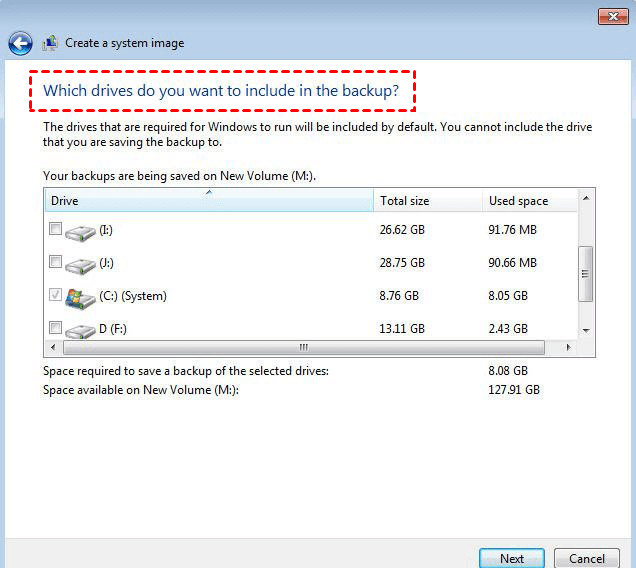
Step 4. Here you’ll be asked which drives you want to include in the backup file. The system drive and system reserved drive are included by default. You can add more drives to the image file. Click Next to proceed.
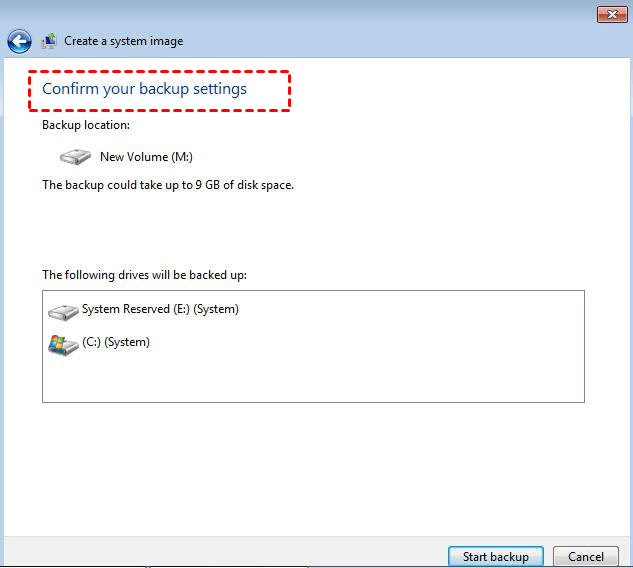
Step 5. You can check the backup location and the size of the backup image. Confirm the settings via clicking Start backup.
Step 6. The image files are saved in “WindowsImageBackup” menu on the SSD.
▶ Part 2. Create a bootable media
Step 1. Download and install Windows 7 USB/DVD Download Tool.
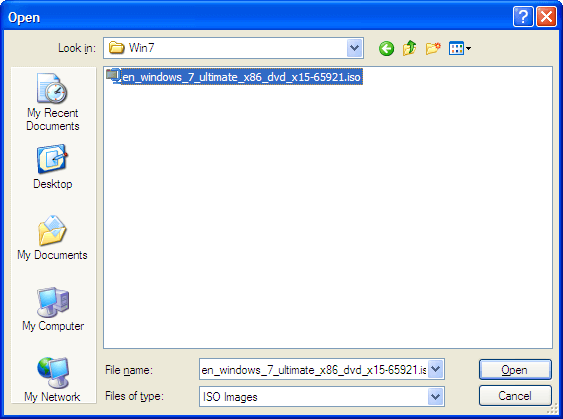
Step 2. Before we create the bootable USB drive, first thing we need to do is to locate the ISO of Windows 7 installation file.
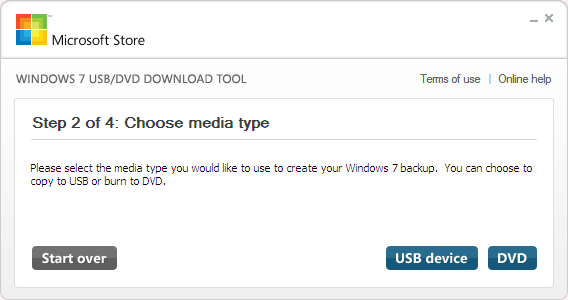
Step 3. Select the media type that you would like to create Windows 7 backup device. Here we choose USB device. Just connect a USB device that is at least 4 GB.
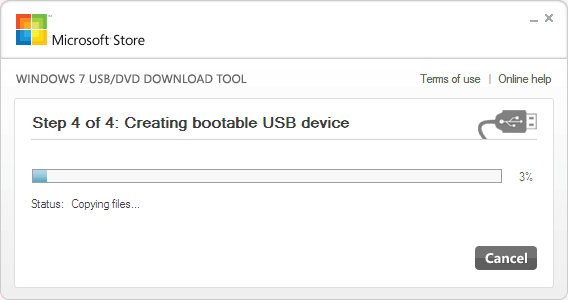
Step 4. The program will create a bootable USB drive.
When it’s shutdown the computer and connect SSD. Go to BIOS when booting and change the boot type to USB drive.
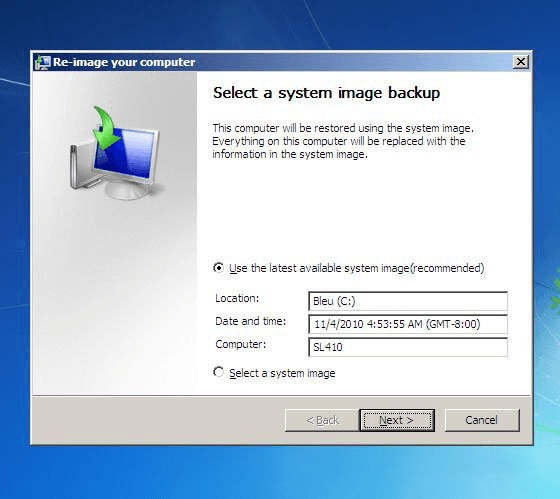
▶ Part 3. Restore the image to the SSD
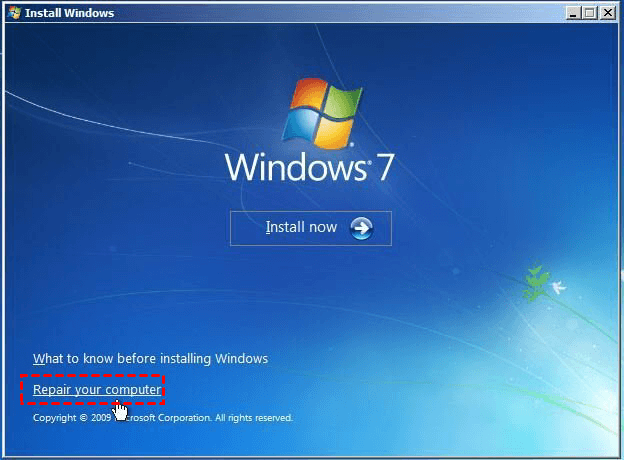
Step 1. We will see the installed Windows interface. Do not choose Install now. Click on "Repair your computer".
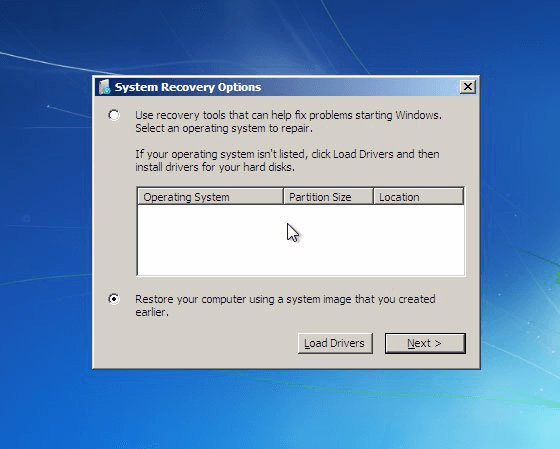
Step 2. Check “Restore your computer using a system image that you created earlier”.
Step 3. The image file on the USB drive will be detected automatically. Click Next and follow the wizard to complete the restore process. Reboot the system and we will find that Windows 7 has been cloned to SSD already. Then, you can use the HDD for data storage and backup purpose. Learn how to backup SSD to HDD partition.
Summary
In the above content, we introduce two free methods, with either of which you can migrate Windows 7 to SSD without reinstalling. Compared with the backup and restore process, the “Migrate OS to SSD Wizard” from AOMEI Partition Assistant Standard is much easier and simpler. Besides, it can migrate the entire Windows 7 hard disk to SSD via the “Disk Clone Wizard”. If you want to migrate Windows Server to another disk, the AOMEI Partition Assistant Server can help you.

